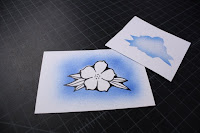
More new Products for CHA
The next new product I want to share is also from Australia, new Mask-It masking film, from X-Press It Graph X. This stuff is perfect for those of you who frequently airbrush and want a high-quality mask that will last over and over again.
Mask-It is a clear, medium-tack adhesive backed film that is easy to cut, and easy to apply. It works great on cardstock and is perfect for protecting areas of your work that you want masked during airbrushing. One really nice point is that you can clean the surface between sprays, unlike using paper masks that get sticky from ink buildup. Best of all, since it's totally clear, you can assure accurate positioning every time.
 Using Masking Film
If you have never used a mask before while airbrushing, then this tutorial should be really useful. There are many types and kinds of masking films, friskets, and adhesives available, but for today's tutorial we are using Mask-It, medium tack film.
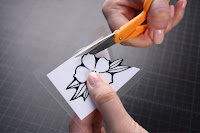 1. Start with a copy of your image stamped or photocopied onto scrap cardstock. Apply a small piece of clear film over the stamped image. Make sure there are no air bubbles under the film, as this will distort the final shape when you re-use the film. Note: test your Mask It to make sure it will not pull up the fibers of your paper. If it seems to be stronger than the paper, then gently touch the adhesive to your clothing before applying to the paper. This will make it less tacky.
2. With sharp scissors, carefully cut around the scrap ima
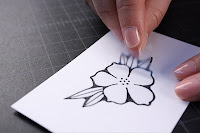 ge. Save any pieces you will be using for masking. If you are airbrushing around a shape, save the inside, if you are airbrushing inside a shape and protecting the surroundings, then save the outside. You do not need to save the paper parts, just the clear Mask-It.
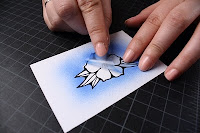
3. Apply the clear film to the area you want protected when you airbrush. This is tricky, since images with thin lines can shift easily, and you don't want to block any areas that should be airbrushed (it looks strange when you have an unintentional white halo around your art). Make sure that the film is smoothed down at the
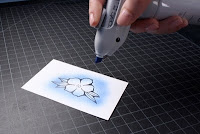 edges and won't move once you start blowing air.
4. Airbrush from the middle out. The medium tack film is great because even on fine detail areas it doesn't blow up around the edges, even if you've used the same mask a few times.
5. Carefully remove the frisket, and you're done! Save the used piece for your next project with that image. If you get a marker buildup, simply wipe the surface with hand-samitizer.
Come check it out in our booth this week- I think you'll fall in love with it just as much as we have. OK, I hope to post a few more new items before CHA starts, but I'm off to catch my fight now. Have a great weekend!

Excited to get some of this film too! Still saving for my airbrush compressor though....hopefully soon!
ReplyDeleteThat looks so cool. Can you get it in Canada?
ReplyDeleteSHUT UP!!! Ok, now I can't wait to know where I can get it!!
ReplyDeleteI tried a frisket before - what a pain in the you-know-what to take off! I had given up on masking, but if this works as easily as it looks...
ReplyDelete