 Basic Leaves and shadows
As I mentioned yesterday, there are many shades of green and each has a different feel. As Spring gets closer new leaves bud from dry branches and blossoms appear. Growing up I had a giant Lilac bush outside my bedroom window. I love how it grew beautiful lilacs and perfect little leaves each spring. Today I want to color just the leaves of the lilac bush and then we can move on to a whole branch.
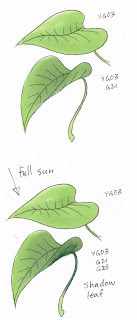
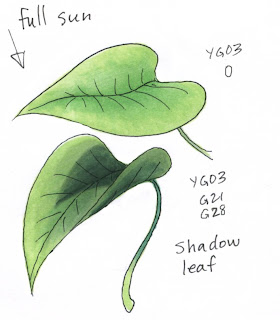
 New Spring leaves are young and warm, so for these lilac leaves I am choosing a base color of YG03. I color the whole area of both leaves to give the bright warm green tone that will set the mood and feel for the entire picture.
Since the top leaf is relatively flat it will not have much color variation from the sunlight. However, I lightened up the edges slightly with a colorless blender just to give it a little visual interest. I think I also added some tiny hints of YG06 but I forgot to write it in.
If the bottom leaf were totally flat like the top leaf it would be an overall brighter green just like the one above it. However, because the bottom leaf is sitting at an angle from the sunlight it will be more shaded and look less intense. Also, we see the curled edge revealing the underside. From the angle of the sun we know the underside will be in shadow.
I am adding a hint of G21 to all of the bottom leaf except for the outer edge, because that area will catch full sunlight. By using a lighter but duller color (G21 is a 1, vs. the YG03 which is darker) it keeps the color darkness and family of the YG03, but it adds subtle grayness hinting that later this leaf will be in deeper shadow. The two leaves still look natural together. If I were to have colored the bottom leaf all G21 without the YG03 base coat then it would look VERY strange next to the top leaf (try it yourself and you'll see what I mean). Be aware that the order in which you lay colors is just as important as which colors you used.
 Slowly I darken the shadow areas. First, I go for easy shadows. I know that the underside of the bottom leaf will be in shade, so I add G28. I didn't have a G24 at home when I colored this or else I would have used that as middle step. Without the G24 I had to blend using the blending on a palette technique so that my pale G21 faded into the much darker G28 smoothly (in this case I just pulled the caked G28 off the inside of the cap with my lighter G21). By using lots of lighter layers that gradually darken it is much easier to get a smooth blend. Also, by starting with both leaves colored with YG03 they look like they are from the same plant, just with different shading.
Last, I add the darkest contrast and the shadow that the top leaf is casting on the leaf below. Again, I use G28 for my deepest shadows. I have to imagine the triangle of the top leaf and how it blocks the light on the bottom leaf. Although the top leaf has a straight edge I need to remember that the bottom leaf curves, so the straight shadow edge from above ends up following the curve of the bottom leaf.
 When working on a shape like this leaf which has distinct direction (the veins) add your darker color in strokes that follow the direction of the veins. That way if you make a streaky mistake it will not be as noticeable.
I drew these leaves with a 0.1 mm multiliner onto color laser copier paper then made copies to practice coloring on. These leaves are a smaller study of a larger artwork. Many times I'll work out one element from a larger picture just to get an idea of color, technique, and lighting before I commit to a full illustration. By working on the thin copier paper it takes much less ink to evenly saturate, and the paper is nice and vibrant.

Thank you very much..!!
ReplyDeleteThanks so much for this lesson. It comes at the perfect time with all the new spring stamps.
ReplyDeleteGeesh, I visit your blog every single day, and I just realized that I NEVER post to tell you how much I appreciate your tutorials and inspiration!! I apologize for that and didn't want you to think that us readers were taking you for granted!!
ReplyDeleteThank you!! Thank you!! Thank you for these awesome tutorials!! You probabably don't have a clue how much they are helping beginners like me to use the Copics (and look like we know what we are doing!!).
Here's another thank you from someone who rarely shows her appreciation but has learned SOOOO much from reading your blog. I have saved all your tips and what-nots to a special folder all their own. I sincerely appreciate the time and effort you spend on your fabulous tutorials. They are always filled with an abundant amount of information, as well as inspiration.
ReplyDeleteHugs~
Freida
I happened upon your blog via the usual blog-hopping and I'm so glad I did. You are my first port of call now for all things Copic.
ReplyDeleteThank you for sharing your extensive knowledge. I find it invaluable.
Viv xx
(Binned my previous comment due to spelling mistakes)Doh.
oh, I love the greens! I don't think I've ever seen a lilac in my whole life! I don't know if they are even able to grow here in So Cal. I sure would like to go see (and smell) them someday!
ReplyDeleteThanks so much for the awesome tutorial!
ReplyDelete