Basic color blends
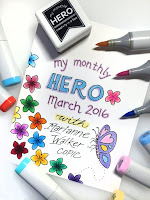
I am so excited to be sharing these fun, exclusive Hero Arts kits! These little pictures, stamp set, and book were so much fun to draw and color. Each of the provided 1/4 page panels are printed on high-quality X-Press It Blending Card, meaning your artwork will pop when colored with Copic Markers!
For this project, I chose the 1/4 pg panel "Beauty is a light in the heart" These flowers are sort of like poppies, but not really. However, I decided I wanted to work with a vibrant, red-orange color scheme, similar to what you might find on poppies.
Whenever I color flowers, I tend to color the greenery first, and this project was no exception. I started with a smooth base of YG11, then gradually went in and darkened each leaf with YG13 and YG17.
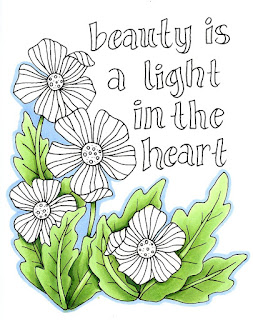
I tried to pay close attention to the veins on the leaves, the shadows between leaves, and the dark areas where the flowers stand out from the leaves. I left the main view of each leaf lighter, as I knew that later on I would be adding more tones over the top.
I finished the leaves with dark accents of G28. Then I added a blue outline to the image with B32. I know I've said this many times on my blog, but contrast is key! Because I have a range of tones from the really light YG11 all the way to the very dark G28, I have a great range of contrast and the leaves are much more dynamic.
The pale blue border pulls everything together. Usually I would add the blue last, but I went outside the lines a little, and the pale blue covers/pushes those mistakes out of the way, so that you don't really notice them as much.

Next I worked on the flowers. I started by coloring the centers with Y02. Then, I colored the petals with YR12. I also added a faint ring around the yellow portion in the center with the YR12 and blended that out, just to give a little dimension.
I colored each flower with YR12, then I darkened it with R05 and added extra contrast with hints of R29. I was careful to darken under each folded petal so those looked more interesting and dimensional.
I think the red really helps the orange pop off the page more, though I worked with a very orange red (R05) so that it was not changing the tone too much. Also keeping the centers a pure, vibrant yellow as much as possible makes the petals look really sharp.
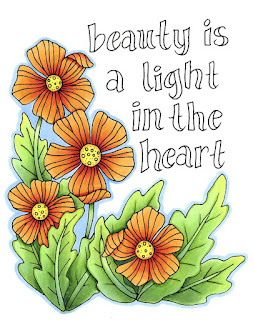
I finished up coloring all the flowers, then I came back with B32 and continued the border around each bloom. I also wanted to add more color depth to the green leaves, so I took the same B32 and added a faint overlay to the shadow areas of the leaves. You can see it in the stems on each leaf. Cool colors, like blue, help make these areas softer and feel more like they are in shadows.
The tips of the leaves I warmed up with a faint layer of Y02. You can barely see it, but it makes those leaves feel more like they are catching the sun. I know it's subtle, but it does help to make the overall piece look more dynamic.
Last, I colored the text with YG11, YG13, and G28. I added a faint blue shadow to each letter on the left side using the B32. This just gives it a hint more dimension.
And, though it doesn't show up on the scanner, I took a peach Spica glitter pen and colored over all the flower petals. Now, in certain light, each flower shimmers. I love how easy this project was and how beautiful it came out. My goal in drawing these cards for you ,was to help you have beautiful results easily, so let me know how it goes with your own project.
I hope each of you has as much fun coloring these as I have had! Now, I encourage you to go visit the rest of our fabulous team members to check out the other awesome creations for this monthly Hero Kit by
Hero Arts Blog hop.
 Quick Spring Card Project

