
 Texture without the colorless blender
It has been a while since I made a tutorial about textures. Today I want to share an image that you can print and practice with on your own. Be sure to test your ink compatibility before coloring, or photocopy this image so you do not ruin your marker nibs.
 In the past, I have shown how to get the look of fur or sweater using the colorless blender solution or a rag. However, sometimes you just don't have those tools around, so I want to share techniques I use to achieve that look with nothing more than the marker itself.
 Is texture needed? How will this change my image?
First, decide if you need texture. The lines will tell you if it should have texture. This sweater is drawn with rough edges and little dots to suggest texture, so it needs a texture to match. The fur is not smooth, it is drawn as long tufts, so it would not get the same, short stubby texture that the sweater needs. If an image is drawn with smooth lines, wiht no suggestion of texture, then it may look strange if you give it too much texture.
Here is the cat colored with no texture (blended), then a sample using almost exactly the same colors, with texture added.
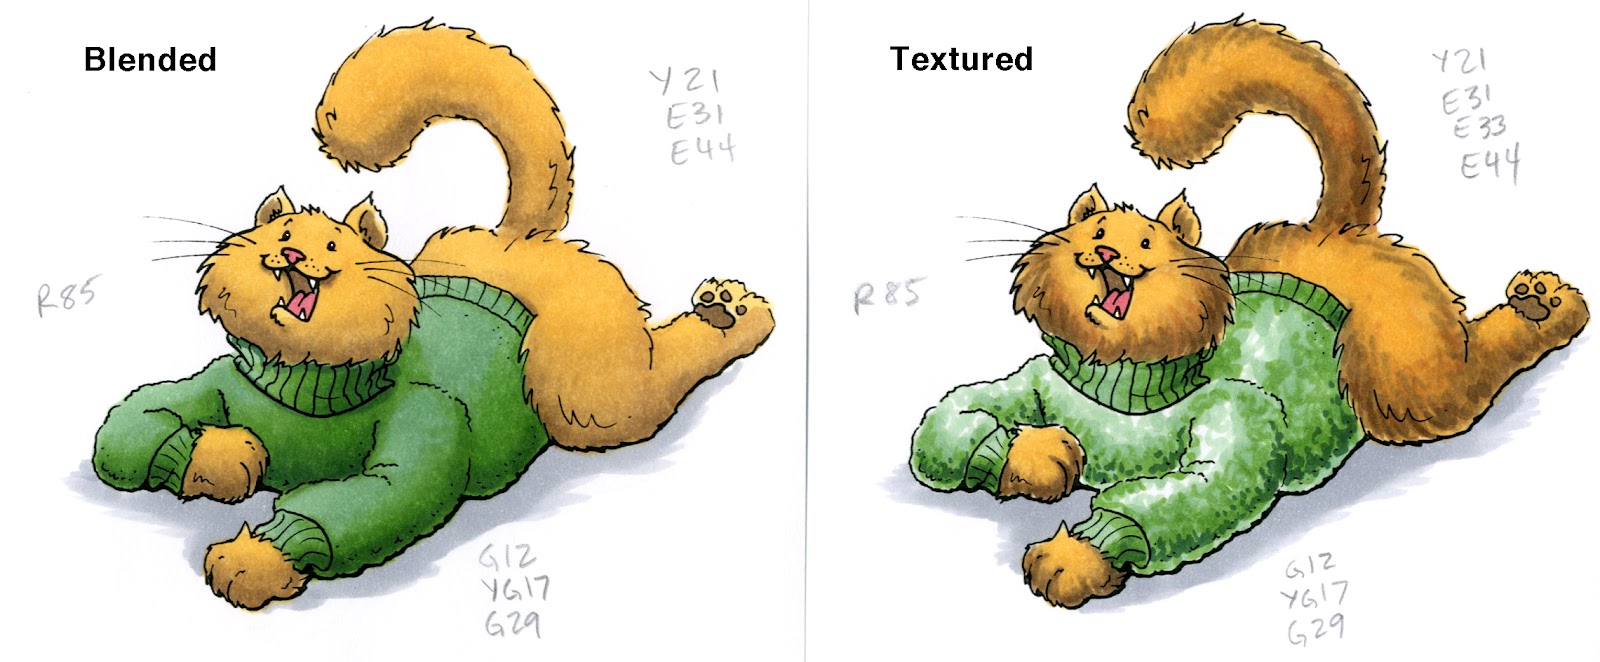
On the sweater, I decided to leave the highlights white. The other three greens are the same. However, the difference in contrast is so much stronger. These are all creative decisions you will have to make. EXPERIMENT! it is only a piece of paper. try coloring the sweater a couple different ways to see how much contrast you like, or how strong/subtle you want the contrast.
Usually, when I add texture using a rag or cloth, it will lighten an area up as well. Keep this in mind when you are choosing colors. If you add blender it will get lighter, if you layer dark colors, it will go darker.
Next week I will finish up with more examples. This weekend, practice coloring this cat with texture in a few of your favorite ways, then I'll show you some techniques I use. Feel free to post samples of this to your blogs (giving credit to where they can get the image for themselves) and post links on the comments here.
I look forward to seeing what you come up with!
2 comments:
Pretty new banner
Thanks so much for sharing these fabulous techniques- I have a few days off and am going to try this! I love the dimension the dotting adds. I am a visual learner- so really appreciate these picture tutorials!
Post a Comment