First of all, I want to apologize that the artwork on my auto-post on Friday didn't download. I don't know what's wrong, but I'm going to try and find the original file and fix it soon.
 Coloring large areas
Today I want to start on the first part of a couple posts on smoothly coloring larger areas (larger than 3" x 3"). There are a few ways of doing this, some will work better for you than others, and some will be easier for blending than others as well. Before you even get into coloring there are a few things to consider to make sure that your picture is smooth from start to finish.
Whenever you color you should consider these suggestions. Get in the habit of being prepared so that you get the best coloring, no matter what size your area. Tomorrow I'll get into methods and techniques, but I'm purposefully trying to keep my posts bite-sized so they're easier to digest.
 Things to keep in mind before coloring a large area.
These tips are good when coloring any picture, but particularly when you are coloring larger areas these mistakes will really catch up with you.
 1. Make sure you have clean, even scratch paper under your work. This seems like an obvious thing, but if you have an edge from scratch paper under your coloring area it may cause you to get streaks and un-even coloring. Also, if your scratch paper is dirty it will pick up color and ruin your work.
2. Juicy markers work better. If you're doing a background with your favorite light blue marker that you use all the time you may want to fill 'er up before you start coloring (don't overfill). It would be really bad if it runs out half-way through your work and you have to stop and refill.
3. Thinner paper is easier. When you have to color a large area evenly you will need to work fast. Thick paper like PaperTrey Ink's Stamper Select or some bristol boards are so thick that to evenly color and smoothly saturate the paper you have to color slower. Slow coloring on large areas causes streaks. Copic has a new prototype stamping paper coming out soon- it's thinner than stampers are used to but heavier than regular paper (about a 40 or 50 lb. paper). You wouldn't make your base card out of it, but because it is thinner it takes less ink to soak. I'll do a full review soon after I get more feedback on it.
Why architects and designers like Alcohol Marker paper is because it is very thin. It takes very little ink to get a smooth large area colored. Too bad those papers are coated so they don't give you easy special effects like I prefer.
4. Don't touch the paper. What do you mean, Why shouldn't I touch it? Before you color a large area put down the potato chips, make sure your hands are clean, and try not to touch the large area you're coloring with your greasy fingers. On some papers you'll end up seeing the fingerprints, so try to hold the paper on it's edges or make sure your hands are clean and dry. Likewise, try not to rest the sides of your hand directly on the paper, put a napkin or something under your hand so it doesn't smear.
5. Make sure your work area is clear of things your arm may bump into. Also make sure no one is going to distract you. I can't tell you how many times I've had to tell someone "Wait, I need to finish this area first or else it will look bad." Usually they look at me like I'm crazy obsessed over my pictures, but really, if you have something in your way that you need to move or someone comes and bugs you it will slow down your coloring and then you risk streaks.
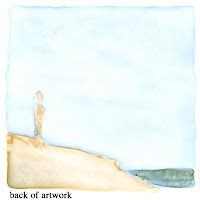
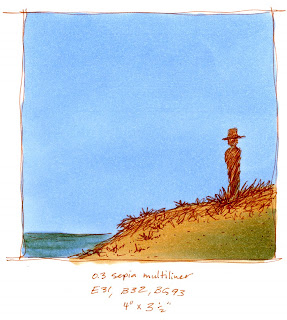
 Here is my final piece today- it's a solid bright blue sky with the silhouette of a man looking at the ocean below. I drew this with a sepia multiliner onto color laser copier paper (very thin) and colored it simply, quickly, and smoothly to show how even you can make large areas. I also included the backside to really show how a smooth picture should look from the back (and because I think the backside looks cool). Just so you know, I didn't photoshop the picture to get rid of streaks either- I just colored smoothly and quickly using one of tomorrow's techniques.
Let me know any of the problems you've encountered when trying to color large areas and I'll try to solve those this week. Have a great day!


10 comments:
Thank you so much for doing this! I will be following you. Are you going to talk about how you stoke your brush? Do you color left to right or in circles? As you can tell I am a real 'newbee'. Looking forward to your future artiles.
LOL I made my son's piano teacher wait yesterday cause I was coloring! She thought I was insane...but you know otherwise! :)
I don't know how I'd manage without you!!! xxx
Thank you so much for revisiting older posts. There are several people on the Sihouette Yahoo group that are interested in Copics but don't know much, if anything, about them other than they see them used in Blogland all the time. They have been referred to your wonderful blog.
Thank you so much for going over
past work. I can benfit from
anything and everything you show
for a beginner!
Thank you for this! I've been struggling with some large image coloring this week, and bam, your post popped up in my reader. Just what the doctor ordered. I was using my favorite paper (Papertrey's), and I guess I need to switch for my larger stamps. Good tips! :)
Thank you! I have had your posts on this saved in my google reader and am just now getting time to sit down and read completely.
THank you again for putting this together!
THANK YOU!
like everyone already said: THANK YOU so very much for helping with the coloring. I will read through it all too and learn from it.
Post a Comment