 Happy Halloween! Finally, I'm going to finish up talking about airbrushing and next week we can move on to some new topics. I can't complete my discussion on airbrushing without talking about masking techniques.
 One of the problems with the Copic Airbrush System is that for any kind of crisp edge you need to mask your image in some way so the spray goes only where you want it to go. So far I've already shown you a few different masks, but here is a rundown of some common mask types and ideas for using masks.
Different Mask types
 1. Paper. This can be as simple as holding a torn piece of paper in place with your finger, or cutting out detailed shapes in paper and spraying around them. Whichever route you go, you'll want to make sure that your edges are securely held to the paper or else you'll get the spray creeping under the edge of your artwork. Sometimes I'll hold the paper in place with removable tape, sticky putty (that blue sticky stuff you use to hold paper to the wall), or I'll just use my fingers.
A lot of stampers like to cut out a mask from one of their stamps and keep the mask stuck to the top of their wood stamps so every time they use that stamp they have the mask right there with it to airbrush their background.
For crisper edges with paper- Spray straight down over the paper or aim your spray so it sprays from the paper out to your surface so your air isn't aimed up under the edge.
Pro: Easy
Con: Air wants to creep under so adhere it well
2. Adhesive Papers & tapes
This includes everything from standard masking or painting tape to low-tack stickers and sticky notes. You can buy tapes usually on a roll (like 6" wide Eclipse Tape by Judikins), or sheets of low tack adhesive. You can even put down a few sticky-notes to make crisp straight lines without much fuss. This is a good alternative to regular paper, but always test the surface you're sticking to so you don't ruin your artwork. Common masking tape was developed for painters to be removable, but on softer papers it will remove fibers so test each brand and see what works best for your surface
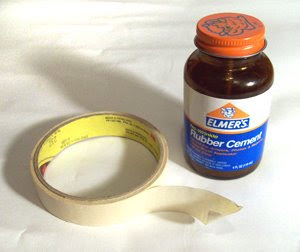 Pro: Easy, prevents air from sneaking under the mask better
Con: Test the different adhesives on your surface so you don't ruin your work.
3. Masking Liquids
This includes liquid frisket, rubber cement, etc. I really liked how Plaza Arts' website explains this stuff, so I'm just going to quote it:
Watercolorists traditionally paint whites by leaving the white of the paper. To do so, these areas need to be protected from being painted inadvertently. This means you must plan ahead for where those areas are going to be and take care not to paint over them by mistake. An easier way to handle this is to mask them with pieces of tape or masking fluids. Masking fluid (sometimes referred to as liquid frisket) can be applied with an old, worn-out brush (never a quality, or new brush) to those areas that are to be protected then allowed to dry. Once the surrounding area is finished being painted, the masking fluid can be removed to once again expose the white of the paper underneath. To remove the mask, rub it gently with a clean dry finger or rubber cement pickup.
So frisket was created for masking watercolors, but it works for airbrushing as well. Again, test it on your surface and make sure you can easily remove it.
Pro: Apply it exactly where you need it
Con: You have to let it dry and test each surface
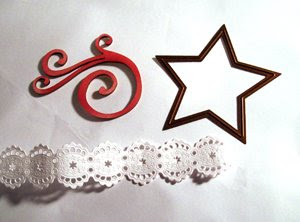 4. Masking with Objects
I've already shown you some examples of masking with objects using the fall leaves and the Spellbinders dies. Doilies, die cuts, lace, punches, gravel, leaves, ... basically anything you're willing to spray over to get a pattern will work. You have the same challenges as plain paper in keeping your edges down to prevent overspray. Some objects, like the metal dies, can be cleaned afterwards with hand sanitizer. Other objects will just get sprayed on and sprayed on and, you get the idea. Whatever you mask with be sure it's something you're OK with getting dirty.
Pro: Fun & easy to get neat shapes
Con: stick it down well so it doesn't blow all over the place.
5. Wax Masking
I already talked about this a couple weeks ago, so go look up Part 1 and Part 2. You can also buy kits for making Ukranian Eggs that have a special heated wax applicator that gives you super-fine lines. I've never used them but the concept seems simple enough.
Pro: easy
Con: doesn't work on every surface
There are many ways to mask, and some I know I haven't mentioned but this is a good list to get started with. Now that we've talked about how to mask, let's see how to effectively use a mask. Color Sequence is very important. As the frisket quote mentions, we need to plan what areas we are leaving white, what areas we color first then cover up, and what will be darkest or lightest. This is the part that will take more practice and I don't think I'll get into spray sequence much today because I want to show something else.
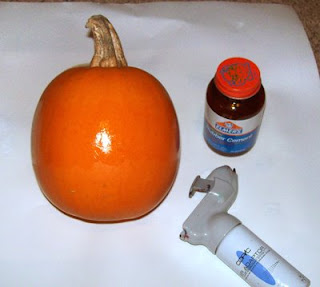 Airbrushing With Rubber Cement
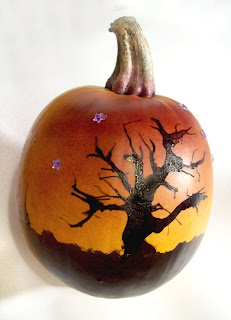
For my project today I'm going to airbrush a pumpkin.This is a pretty small pumpkin, but it's the one my son picked from the field, so I've got to decorate it, even if it's a little small for cutting. I want to have grass and a creepy tree in silhouette, with a sky that fades to orange (from the pumpkin). I want the line between grass and orange sky to be nice and crisp. If I drew straight on the pumpkin with my markers it would be streaky, so I need to airbrush to get the even coverage I want (notice that I'm working over a large piece of scratch paper to protect my carpet from getting sprayed).
 First, I masked the sky line with some rubber cement (you can't see it). I let it dry completely then I sprayed my grass with a black 100. Then I carefully rubbed away the rubber cement to get my clean sky/grass transition. This part was super easy- I just had to make sure that my cement completely covered the area that might be sprayed and had to wait for it to dry completely.
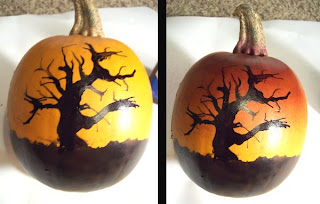 Next, I dripped on some black refill ink and blew it around carefully with a little straw (this part took much longer to get the correct). On a pumpkin, if you make a mistake just clean it up with hand sanitizer and some tissues (I must have gone through half a box of tissue and my fingers look like Dalmatians now). However, after much care and practice I got a twisted tree shape that's a little bigger than I hoped, but my pumpkin is tiny, and the drops are large for this scale.
Then, with a V09 I added my fading dark sky. I sprayed in long even strokes across the horizon of the pumpkin. I did a light layer first then I came back with the same color and added a few more layers at the top to darken it up.
Last, I added some little sticker crystal stars in the sky. They started out clear, but that was too bright so I toned them down with the same V09 that I airbrushed the sky with. I wish the pumpkin were a little bigger so the curve isn't getting in the way of a good picture. Oh well, my son will love his pumpkin. Have a Happy Halloween, All Saint's Day, and Día De Los Muertos!

10 comments:
Super pumpkin! Happy Halloween!!
Wow what a cool project! You are so artsy!
Wow! Beautiful pumpkin.
I never would have thought of decorating a pumpkin this way. How nice to have something that will last longer than a cut one. Just super. The tree is fantastic! You are a true artist.
Amazing! I am thinking about getting the airbrush system...I really love the look it provides! Thank you for sharing this! :)
Oh my! This is just a fantastic project! How totally cool!!
That is one awesome pumpkin! Thank you for the masking topic.. I would like to ask if you can recommend a transparent film for masking?
I haven't tried very many transparent films for masking, so I can't say which types are better, sorry.
Marianne! That is the coolest pumpkin EVAH! I have been doing shows, so I have been MIA for a while, but I am going to catch up until the next show!
Awesome work. You are so talented.
Regards,
sbl photoshop masking
Post a Comment